Friday, December 31, 2010

Strawberry-Cheesecake Brownies

I bought two gigantic bars of Hershey's Milk Chocolate right before Christmas. The large amount of chocolate was supposed to be shared among several people in a gingerbread house party. The chocolate never was used, so I was left with lots of chocolate with no purpose. Since New Years closely proceeds Christmas (obviously), I decided to bake a New Years dessert laden with chocolate. Yum. This is what my mind came up with:


STRAWBERRY-CHEESECAKE BROWNIES
(adapted from Nestle Classic Recipes 2003, Easy Double Chocolate Chip Brownies)

-1 cup (6 oz.) chopped chocolate (I used milk chocolate, but semi-sweet or dark would be great)
-1/2 cup (1 stick) butter
-3 eggs
-1 1/4 cups King Arthur's white whole wheat flour**
-1 cup sugar
-1 teaspoon pure vanilla extract
-1/4 teaspoon baking soda

-1/2 cup Trader Joe's Organic Strawberry Jam, at room temperature
-1/2 cup cream cheese, at room temperature
-1/4 cup sugar

**White whole wheat flour contains a different variety of wheat than conventional flours do. White whole wheat flour still is considered 100% whole wheat flour. Its flavor and texture is just more pleasant than typical whole wheat flour. I use white whole wheat flour in almost all of my baking recipes because this flour has the fiber and nutrients of whole wheat flour, but has similar properties to regular white flour.


Preheat oven to 350 F. Grease a 13" x 9" jelly roll pan.

In a medium metal pot over low heat, slowly melt chocolate and butter. Stir the mixture occasionally. Remove from heat when smooth and luscious. Stir in eggs one at a time. Add vanilla extract and mix. Gradually stir in flour, 1 cup sugar, and baking soda. Mix well until batter is glossy and consistent.

Spread brownie batter into greased pan with a spatula. In a small bowl, mix cream cheese and 1/4 cup sugar. Evenly dollop cream cheese mixture and strawberry jam over batter. Artistically feather the dollops into the batter with the tip of a sharp knife.

Bake brownies for 18-22 minutes, or until an inserted toothpick comes out clean. Cool brownies to room temperature on a wire rack (DO NOT REMOVE BROWNIES FROM PAN). Cut and serve cold or room temperature. Enjoy!
Thursday, December 30, 2010

Blueberry-Lemon Muesli Bread

I received a beautiful bag of Trader Joe's Blueberry Muesli this holiday season (see below). For anyone who is not familiar with muesli, muesli is sort of like an unbaked granola. It isn't as crunchy and overly sweet as some granolas tend to be. Muesli is fresher and more organic/raw-tasting.


I enjoyed my blueberry muesli in soymilk topped with a slice banana. This was a delicious breakfast, but I could not help but wonder, "Would muesli not taste awesome as part of a muffin or breakfast break recipe?". I instantly raced to the computer after breakfast and searched the internet for muesli-containing muffin recipes. I came across a simple muesli muffin recipe from "Something About Penguins" (http://lentilpenguins.blogspot.com/2008/02/muesli-muffins.html). This recipe was adapted from a muesli bread recipe from "Baking Bites" (http://bakingbites.com/2006/02/blueberry-muesli-bread/). My muesli bread recipe combines aspects of both recipes and includes my own little twists.

As I said previously, I used a commercially produced muesli (Trader Joe's Blueberry Muesli). If I had to make this muesli bread again, I would probably throw together a home-made muesli. My dream muesli recipe would consist of oats, sliced almonds, sunflowed/pumpkin seeds, ground flax, raisins, cinnamon, etc. Feel free to mix up your own muesli to use for this recipe.


BLUEBERRY-LEMON MUESLI BRREAD (VEGAN)

DRY INGREDIENTS
-1 1/2 cups muesli
-1 1/2 cups King Arthur's white whole wheat flour (or regular whole wheat flour)
-1/4-1/2 cup raisins
-1 teaspoon baking powder
-1 teaspoon cinnamon
-1/2 teaspoon baking soda
-1/2 teaspoon salt

WET INGREDIENTS
-1/3 cup unsweetened applesauce (I just ground up a small apple in my food processor)
-Zest of 1 lemon
-Juice of 1 lemon plus enough soy milk to measure 1 1/2 cups of liquid (This will make the soymilk thicken/slightly curdle. This is okay!)
-2 Tablespoons canola oil

OPTIONAL TOPPING
-about 2 Tablespoons oats

Preheat oven to 375 F. Grease a standard-sized metal loaf pan with canola oil.

In a medium bowl, mix together all dry ingredients. In a separate larger bowl, mix together all wet ingredients. Add dry ingredients to wet ingredients all at once, gently folding until combined. Pour batter into greased loaf pan, and spread batter into pan with a spatula. Sprinkle with oats, if desired.

Bake bread in preheated oven for 60-65 minutes, or until an inserted toothpick/knife comes out clean. Place an aluminum foil tent over the bread about 15 minutes before the bread is finished in order to prevent over-browning. Nobody likes burnt bread!

Cool bread in loaf pan on a wire cooling rack. When cooled to room temperature, carefully remove bread from pan. The end product is a yummy breakfast bread with a crusty exterior and a deliciously moist interior. The lemon really adds a fun touch! Orange would be a great substitute, also. Enjoy bread plain, slathered with almond or peanut butter, or topped with jam.

Sunday, December 26, 2010

Gingerbread Cheesecake


I try to make interesting desserts during the holidays. This year I was torn between making cranberry-upside down cake, cranberry swirl cheesecake, French chocolate bread with honey and spices, and gingerbread cheesecake. After taking a poll, I decided to make gingerbread cheesecake, a dessert that sounded fun to bake. Boy, was a wrong! It was an overly-complicated, extremely time-consuming Martha Stewart recipe. Most of my frustration concerned the gingerbread crust. Conventional cheesecakes have a Graham cracker crust, but this Christmas cheesecake called for a gingerbread crust. I thought this was a novel idea (it made the finished cake super special). In order to make the crust, however, fresh gingerbread dough had to be prepared and baked. This was extra work, and Martha's gingerbread recipe seemed very strange. I have made gingerbread cookies with my sister for the past two years, and the process is rather simple (dough is prepared, refrigerated, rolled, cut, and baked). Martha's recipe was unlike any that I have ever seen. Her recipe required the dough to be prepared, refrigerated, rolled, frozen for 15 minutes, cut, frozen for another 15 minutes, and baked. Her cheesecake even called for a water bath, which I have never prepared for a cheesecake. I later asked some of my family members (those who have experience baking) what they thought of the recipe. It was agreed that the gingerbread recipe was odd, but the water bath was not totally unheard of for a cheesecake recipe.

The entire gingerbread cheesecake recipe was composed of way too many steps. I would have chosen a time-consuming gourmet recipe I wanted one. Despite the lack of love that was put into the cheesecake's making, the end product was delicious! The cheesecake had an unconventional gingerbread crust, no superficial cracks (thanks to the water bath), an unbelievably creamy consistency, and a spicy gingerbread-type taste. The cheesecake was a huge hit with family! I would not bake this cake again, but I definitely would eat it again!

To any bakers interested in taking on the challenge, the link for Martha Stewart's Gingerbread Cheesecake Recipe is below:

http://www.marthastewart.com/recipe/gingerbread-cheesecake

Tuesday, December 21, 2010

No Bake Chocolate-Expresso Squares

I have been rather busy lately with my academic coursework. The busyness is over--at least temporarily--because the semester is over! It's time to work on all of the things I have been neglecting, like my Etsy and blog. Below is a dessert I made for my birthday (October 26th). It is now December, far from the time that the dessert was actually made, but I am still sharing it.

From what I remember, it was very rich and crunchy. I also remember having fun doing the feather pattern on the top. You will definitely love this dessert if you love chocolate and coffee, since this treat combines both flavors. Get ready for a mocha explosion!

Enjoy!


No Bake Chocolate-Espresso Squares
(Adapted from Family Circle Cookbook 2007)

Crust:
(Bottom layer)
14 Oreo cookies, finely crushed in a food processor
1/4 cup chocolate covered espresso beans, finely crushed with a skillet
1 teas. instant espresso coffee powder
1/2 stick unsalted butter, melted

Filling:
(Middle layer)
1 Tabl. instant espresso coffee powder
1 Tabl. milk
2 cups confectioners sugar, sifted
1/2 stick unsalted butter, softened at room temperature
1 teas. vanilla extract
1/4 cup chocolate covered espresso beans, coarsely chopped

Ganache:
(Top layer)
4 oz. semisweet chocolate, chopped
1/3 cup heavy cream
2 oz. white baking chocolate, chopped

DIRECTIONS:

FOR CRUST:
Stir together first four crust ingredients in a bowl. Add the melted butter and stir until moistened. Press the mixture into the bottom of a 8x8x2" baking pan, and set aside.

FOR FILLING:
Using an electric mixer, whisk together milk and espresso powder in a medium-sized bowl. Add the butter and mix well. Slowly add the confectioners sugar, being careful not to make too much of a mess. Beat in the vanilla, and stir in the espresso beans. Spread this mixture over the crust with a spatula. This part was tricky; you have to be gentle in order for the crust to not move around during the spreading process.

Chill until firm.

FOR GANACHE TOPPING:
Pour chopped semisweet chocolate into a small bowl. Heat cream on a stove top until it just simmers. Pour warm cream over chocolate. The warm cream will slowly melt the chocolate. Once smooth, pour the ganache over the top of the filling. Spread the ganache over the filling so that all of the filling is hidden by the ganache.

In the microwave, heat the white chocolate in a bowl for 45 seconds. While this is heating, prepare a small pastry bag with a writing tip (I used a Ziploc bag with a scissor-snipped corner instead). Microwave the white chocolate for additional 30 second intervals until smooth. Spoon the melted white chocolate into the piping bag, and pipe lines of white chocolate over the ganache topping. The piped lines should be parallel to each other and about 1/2" apart. Run the tip of a sharp knife (or toothpick) across the entire top, alternating directions with each pass to create a feathered pattern.

Chill until firm. Cut into squares and serve cold. Enjoy your labor!

Saturday, October 9, 2010

Mini Blackberry-Lemon Cheesecake Tarts

When I bake, I usually follow a recipe. Baking, unlike cooking, is a scientific skill that must be learned and practiced. I was feeling spontaneous this weekend, so I decided to bake something without a recipe. That's right, NO RECIPE! I based my measurements solely off of consistency, texture, sweetness, and color. This is what I came up with:

Mini Blackberry-Lemon Cheesecake Tarts


*Makes roughly 15 tarts*

Crust:
-1 1/2 cups oats, ground
-1/4 cup oats, not ground
-1/4 cup + 2 Tbpns sugar
-2 eggs

Preheat oven to 350 degrees Fahrenheit and grease a tray of mini muffin tins. In a medium sized bowl, beat eggs and sugar together with an electric mixer until creamy. Add oats (ground and unground) to the egg-sugar mixture, beating until incorporated. Use your hands towards the end, if necessary.

Pinch off pieces from the dough, roll them into small balls, and press them into the greased mini muffin tins. Be sure to work the dough up the sides of the muffin tins to create walls for the tart. This part may get messy, so feel free to dust your hands with flour between each tart.

Bake tarts in the preheated oven for about 20 minutes, or until edges become golden in color. Cool and remove tarts from muffin tins. These tarts will be filled later. I stored mine in an airtight container overnight.


No-Bake Lemon Cheesecake Filling:
-2 8oz. packages of Philadelphia Cream Cheese, cooled to room temperature
-The zest and juice of one lemon
-3/4 cup granulated sugar

Place room temperature cream cheese into a medium-sized bowl. In a small sauce pan, mix lemon juice, lemon zest, and sugar together. Heat this mixture on medium heat until it JUST bubbles. The sugar should be dissolved at this point. Beat cream cheese with an electric mixer and slowly stream in warm lemon simple syrup. Mix until smooth and creamy. Cover bowl with plastic wrap and chill for several hours or overnight.

Assembly:
-Baked tarts
-Chilled lemon cheesecake filling
-About 1/2 cup black cherry jam

Spoon chilled cheesecake filling into a piping bag fitted with a star tip. Heat jam in the microwave or on the stove top until warm and pourable. Place teaspoon-sized dollops of jam into the bottom of each tart. Pipe cheesecake filling on top of jam. Chill tarts for several hours. Dust confectioners sugar over tarts before serving.


Friday, September 17, 2010

Falafel


Falafel is probably one of the most delicious Mediterranean foods I have ever eaten. If you're unfamiliar with this tasty vegetarian treat, falafel are smallish, crispy patties made of chickpeas. They are typically fried in oil, spiced with cumin and garlic, and served in a warm pita with tahini or yogurt dressing. I found an easy falafel recipe online (I cannot recall where) and did some personal editing to make it my own. I added ground coriander and extra cumin, garlic, and parsley to the recipe. I decided to skip the frying step and instead bake the falafel to perfection. The end result was healthier and just as crispy. Enjoy!

Vegetarian/Vegan Falafel

-1 cup chickpeas, cooked
-1 small onion OR 1/2 large onion, diced
-2 cloves garlic
-1 Tablespoon flour
-1 1/2 Teaspoons ground cumin
-1 Teaspoon ground coriander
-2 Teaspoons dried parsley
-Salt and pepper, to taste
-Canola oil, if frying

Heat oil in a skillet OR preheat oven to 350 degrees Fahrenheit.

Grind the garlic cloves in a food processor. Add the chickpeas and pulse until smooth. Scoop mixture into a large bowl and add diced onion, flour, cumin, coriander, parsley, salt, and pepper. Mix with clean hands until all ingredients are well-incorporated into the ground chickpeas. Form mixture into balls (about the size of meatballs) and slightly flatten to form patties. Bake falafel on a sheet of parchment paper for about 15 minutes. Turn broiler on high (this is how the falafel get crispy) and let falafel crisp up on each side, flipping once to allow both sides to get golden brown. Remove from oven and ingest.


I also make a homemade Tahini Dressing to go with my Falafel.

Tahini Dressing

-equal parts of tahini and water
-a splash of rice wine vinegar OR lemon juice
-a clove or two of garlic
-ground black pepper

Whirl all ingredients in a food processor until creamy. Serve alongside falafel.

Saturday, September 11, 2010

Spiced Banana-Oat Vegan Waffles


Breakfast is my favorite meal of the day. I am definitely a "morning person", and I think this is so mainly because I eat well-balanced, nutritious breakfasts that are loaded with fruit, protein, fiber, and whole grains. A good breakfast energizes me so that I can perform to my fullest potential throughout the day. How do I do it? I do all the hard work when I have time (the weekend). Below is a recipe for Banana-Oat Vegan Waffles. The batter can be prepared entirely in a food processor or blender, making clean-up a dream. I added in some fun ingredients to transform my waffles into fancy gingerbread-style waffles. Feel free to add in what you like!

Banana-Oat Vegan Waffles
(originally from http://www.chooseveg.com/display_recipe.asp?recipe=115 )

2 cups oats (I used rolled oats)
2 cups water
1 banana, sliced
(Add in the 5 ingredients below to make my gingerbread-style version)
1 Tablespoon blackstrap molasses
1 Tablespoon ground flaxseed
1/2 Teaspoon cinnamon
1/2 Teaspoon ground ginger
1/2 Teaspoon ground cloves

Preheat your waffle iron. Combine all ingredients in a blender or large food processor. Blend until smooth. Batter may seem thin and watery; this is OKAY. The oats will absorb the water more as they cook in the waffle iron.

Lightly grease the preheated waffle iron, and pour in the batter. Regrease the waffle iron after each batch of waffles is removed. Be sure to mix the batter prior to pouring it in order to redistribute the oats throughout the batter.

Freeze or serve immediately with fresh fruit and blackstrap molasses.

Saturday, September 4, 2010

Coconut-Lime Macaroons

I enjoy reading information. A good cookbook is very similar to a scientific textbook in that both present valuable knowledge to the reader. Cookbooks provide golden information, as well as inspiration, that can be utilized in future recipes.

I was browsing one of my first ever cookbooks the other day, Children's Quick & Easy Cookbook by Angela Wilkes, and I came across a three ingredient baking recipe. This is a rarity. I edited the recipe by adding a special ingredient (lime zest) and replacing an existing ingredient (ground almonds) with another (shredded coconut). Below is my recipe for Coconut-Lime Macaroons.


Coconut-Lime Macaroons

-2 eggs, separated
-1 1/2 cups shredded unsweetened coconut (I used Bob's Red Mill Unsweetened Medium Shredded Coconut)
-3/4 cup white sugar
-zest of 2 limes
-pinch of salt

Preheat oven to 350F, and line two cookie sheets with parchment paper. Separate 2 eggs, placing 2 egg whites in a large clean bowl. Save or toss the yolks.

Add salt to the bowl containing the egg whites and whisk with an electric mixer until stiff peaks form. Gradually fold in lime zest, sugar, and shredded coconut with a rubber spatula. Add the zest, sugar, and coconut in several batches in order to preserve the fluffy nature of the whisked egg whites.

Place tablespoon-sized dollops of the mixture on the prepared baking sheets. Bake for about 15 minutes, or until golden brown in color. Immediately remove the macaroons from their baking sheets and place them on a cooling rack. Cool and enjoy these zesty melt-in-you-mouth cookies.

Friday, September 3, 2010

Super Sweet Beet Salad with Feta Cheese and Sunflower Seeds


I have always been curious about beets, that bloody red root vegetable that always seems to get a bad wrap. In fact, when I spontaneously brought beets home from the supermarket, my mother felt it necessary to remind me of her unpleasant childhood beet memories. She apparently was forced to eat taste-less boiled beets. Her hate for beets grew deeper, and her mother continued to cook them for her. Her mother and grandmother have a history of being amazing cooks, so I do not know how "taste-less" those beets actually were. I'm sure I would gobble down those beets if I was sitting at that dinner table! I had no idea how to prepare/cook beets, so I did some research on the internet before I jumped into the kitchen.

I decided to roast the beets in a super-hot oven with salt, pepper, and a little balsamic vinegar. Beets are one of the most naturally sweet vegetables on earth, and I wanted to bring out their delicious sweetness. They took about an hour in the oven. I let them cool to room temperature and peeled of their skin. I was in a rush (I had work), so I quickly threw them in the fridge for the next day.

I was not planning on eating cold beets, and I now needed to brainstorm a bit. It was a hot summer day, so a cold, crisp salad would naturally be the best choice. Beets in a salad? Yes! I grabbed some ingredients that mesh well together and started chopping. My recipe for a Baby Spinach Summer Salad with Marinated Beets, Feta Cheese, Toasted Sunflower Seeds, and Garden-Fresh Tomatoes follows. I used a homemade Honey-Balsamic Dressing.


SUPER SWEET BEET SALAD WITH FETA CHEESE AND SUNFLOWER SEEDS

-2 cups packed baby spinach, chopped
-1 handful of bite-sized tomatoes, halved
-1/4 cup feta cheese
-1/4 cup sunflower seeds, toasted
-1 big handful of roasted beets, peeled, halved, and marinated in the Honey-Balsamic Dressing (recipe follows)

HONEY-BALSAMIC DRESSING
-1/4 cup high-quality balsamic vinegar
-1/2 Tbsp honey
-Freshly cracked black pepper

Whisk together all three ingredients of the Honey-Balsamic Dressing and add beets. Let beets marinate in dressing for at least 30 minutes (I never wait this long because I get too hungry!).

Chop baby spinach and tomatoes on a large cutting board. Toast the sunflower seeds in a skillet over medium heat until fragrant and golden brown in color.

Arrange the baby spinach, tomatoes, marinated beets on a cold plate. Top with toasted sunflower seeds and feta cheese. Drizzle Honey-Balsamic Dressing in which the beets have been marinating over the entire salad. Enjoy.

Sunday, February 21, 2010

Vegetarian Sushi with Roasted Peppers and Cucumber

I think that American cuisine (whatever that encompasses) is very boring. There is very little beauty and originality found in a mundane hamburger plopped in a squishy seeded bun. I try to expand my palette and my creative mind by eating more exciting, ethnic foods. Some of my favorites are Japanese, Thai, and Indian food. Last week, I decided to take my interest in eating authentically delicious food to a new level. I was going to make something extraordinary; I was going to make sushi!

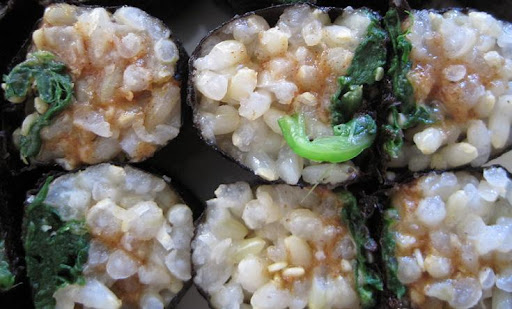
During my first attempt, I made three rolls of vegetarian sushi stuffed with white rice, carrots, cucumber, avocado, and homemade gomasio(toasted sesame seeds, sea salt, and nori). Each roll was contained in a sheet of nori, so the contents wouldn't spill everywhere. There were very yummy, but I wasn't totally satisfied. I kind of took the easy way out, so to speak, since I used non-stick parchment paper to roll my sushi (instead of a bamboo sushi mat) and medium-grain white rice (instead of sticky,short-grain sushi rice).

For my second attempt (above picture), I was going to do it right. I made a trip to my local Asian market and picked up a big bag of short-grain brown rice and a bamboo sushi mat. I boiled the rice, let it cool, and prepared some roasted red pepper and cucumber on a cutting board. I cooked an egg on my stove top in little bit of sesame oil with a clove of grated garlic. Everything was set! I laid down a half sheet of nori (shiny side down) onto my fancy $2.00 bamboo mat, spread the sticky rice, and neatly arranged the prepared veggies and eggs over the rice. The roll was carefully rolled into a cylinder with the help of my beautiful bamboo mat and sliced with an extra sharp knife. I made three rolls, and they were delicious!